
3 new features in Microsoft Teams
There are finally 3 new functions in Microsoft Teams. Get to know these in the following blog post, they are presented individually and are a continuation of the previous updates.

1. Create up to 1000 channels
Teamwork and communication take place in teams channels instead of. A channel is a place where a team can share messages, tools, and files. Each channel is dedicated to a specific topic, department or project.
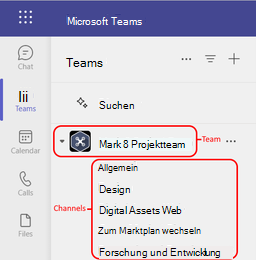
In the graphic you can see that the Mark 8 project team has, for example, the channels “General”, “Design”, “Digital Assets Web” and two other channels. All conversations, meetings, files, and apps in the Design channel are design-related, and everything in this channel is visible to everyone on the Mark 8 Project team. So channels are where the work gets done.
Do you need a separate area or workgroup for a project?
There is now a new channel for this. Create up to 1000 standard or shared channels in new and existing teams without risking running out of space or having another team created for your workgroup. Private channel support will be available soon.
- Standard channels are open to all team members , and everything posted is searchable by others.
- Private channels are intended for discussions that should not be open to all team members.
- Shared channels are used to collaborate with people inside and outside your team or organization.
To always keep an overview, you can show or hide the channels
After the General tab, channels are organized alphabetically. You can't change the order, but you can show or hide them. Choose More options  next to a canal and then Ein- or hide .
Do you want to display a team on your list again? Scroll to the bottom of the page and search under Hidden teams the team you want and select More options > Fade in .
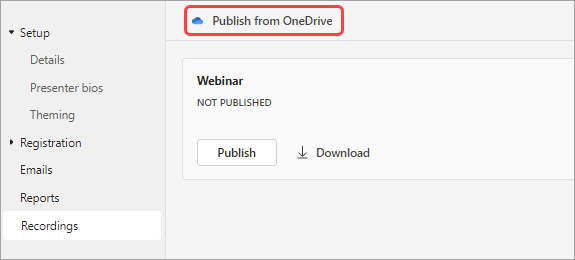
2. Instant publication of webinar recordings
Publish recordings to Teams immediately after a webinar or event to share with participants. To publish a previous webinar in Teams, go to records, and choose Publish. Participants will receive an automatically generated email with a link to the recording.
To publish a recording:
- Go to your Teams calendar.
- Open a past webinar.
- Select Manage event
 .
. - Switch to records , and locate the recording you want to publish.
- Select Publish (if your recording was saved to OneDrive, select Publishing from OneDrive)
Unpublish a recording
Return to recording and select «Unpublish».
The standard is that published records expire 30 days after publication. However, you can expand this by using the published recording extend to 60 days. After the new date expires, you must re-upload and publish the file to maintain sharing.
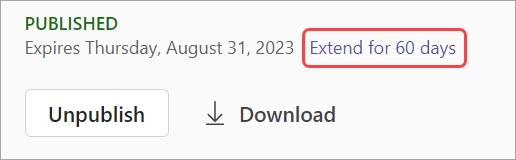
You can save the recording on your device by “Download”.
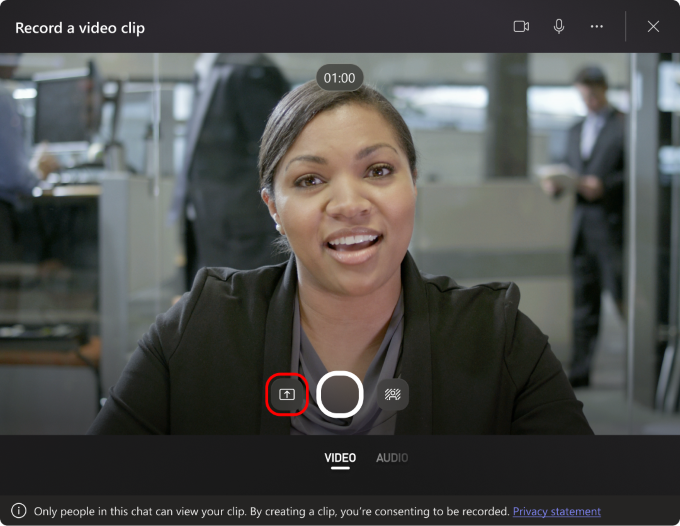
3. More recordings in video clip messages
Now you can now blur your background, record your screen, or just record audio clips.
- Go to any individual or group chat.
- Below the field where you are typing a message, select Rrecord a video clip
 .
. - Select record .

Note: You can pause and resume recording as often as you want.
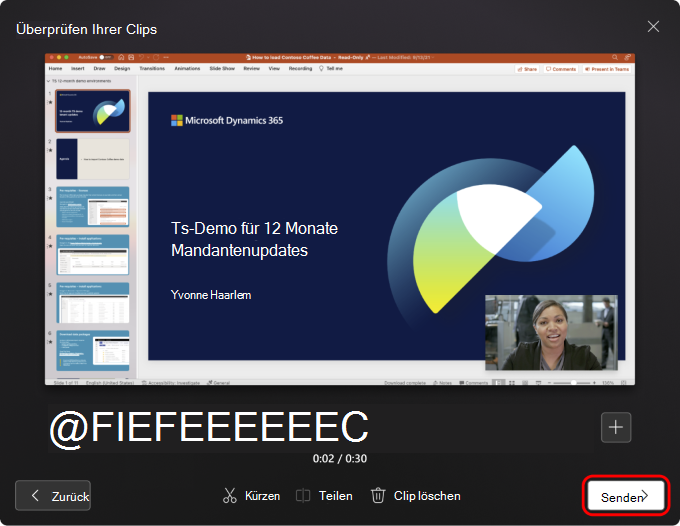
When you're done recording, select Überprüfen out of. Shorten your video clip by moving the sliders in the editing tool and when your video clip is ready to use, select Send to add it to the chat.
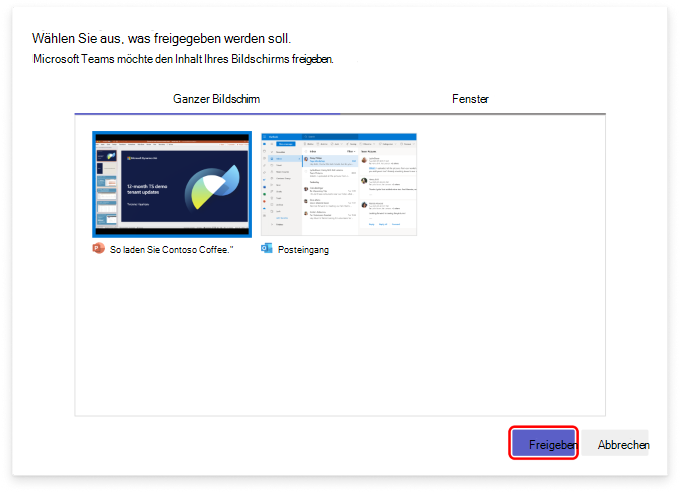
Do you want to record your screen? - That's how it's done:
- Go to any individual or group chat.
- Below the field where you are typing a message, select Video Clip record
 .
. - Select Record screen
Switch To choose a screen to share, then select the screen or window you want to record on and select Release .
The recording lasts up to a minute. You can stop or pause recording at any time by returning to the video recording screen. When you're done, choose Stop recording and trim your video clip if necessary, then select Confirm shortening out of. The trimmed clip can now be reviewed. You can Send select if it looks good, or Back to make further changes.
Do you want to record an audio clip with the microphone? - That's how it's done:
- Go to any individual or group chat.
- Below the field where you are typing a message, select Video Clip record .
- Select Audio and then select the microphone icon at the bottom of the recording screen.
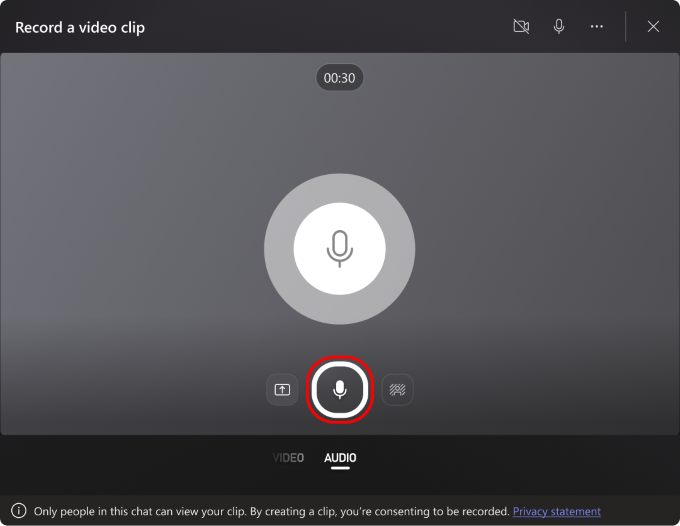
The recording lasts up to a minute. You can stop recording at any time and re-record as many times as you like. If you are happy with the clip, choose Überprüfen and then you can also send it.
subtitle
By default, video clips shared in Teams have auto-generated captions. If you want to turn off subtitles for a video clip you're watching, select Inscriptions  out of. To reactivate it, select labels again .
We are always happy to help you with any questions or extensions: